
Fixing Authorization Errors
Sometimes when connecting a salesforce organization for the first time, a couple of settings need to be tweaked such that Blue Canvas can function properly. Below you'll find a handful of things to check to get your branch up and running.
Connected Apps OAuth Settings
- From setup, enter "oauth" in the quick find box and then click "Connected Apps Oauth Usage"
- On the right, under "bluecanvas.io" click "Install". If it's already installed, click "Manage App Policies".
- Note: In some very rare cases, you can end up with multiple "bluecanvas.io" connected apps. If this is the case, delete both of them and reconnect your org before proceeding, ensuring there is now only one.
- Click "Edit Policies" and you should see a screen like this.
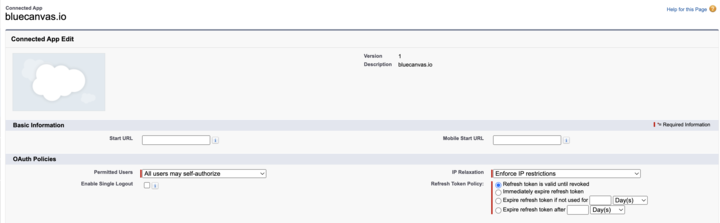
- Ensure under "Permitted Users" you have "All users may self-authorize" selected.
- Ensure under "IP Relaxation" you have "Relax IP Restrictions" OR if you choose "Enforce IP Restrictions" the following IPs must be whitelisted
- 44.196.46.171
- 3.212.34.54
- 23.22.116.57
- 34.201.68.181
- 52.72.201.65
- Then click "Save"
OAuth User-Agent Flows
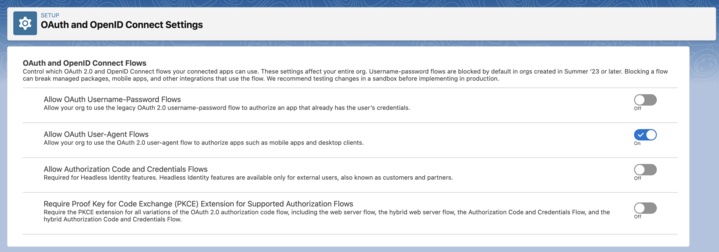
- From setup, enter "oauth" in the quick find box and then click "OAuth and OpenID Connect Settings"
- Make sure "Allow OAuth User-Agent Flows" is "On"
Ensure Connected Profile Has Correct Permissions
- From the quick find box enter "profiles" and then click on "Profiles".
- Select the profile of the user you're trying to connect with. It's highly recommended you use a user with "System Administrator" privileges.
- Click "Edit".
- Ensure "Modify All Data" is checked
- Enusure "Modify Metadata Through Metadata API Functions" is checked
- Ensure "View Setup and Configuration" is checked
- Ensure "Customize Application" is checked
- Ensure "Download AppExchange Permissions" is checked

Even More Permissions
Checking the above permissions fixes the most common issues. If you're still experiencing authorization issues, please also check the following...
- Manage Profiles and Permission Sets
- View All Data
- View All Profiles
- View All Users
- Manage Connected Apps
Session Settings
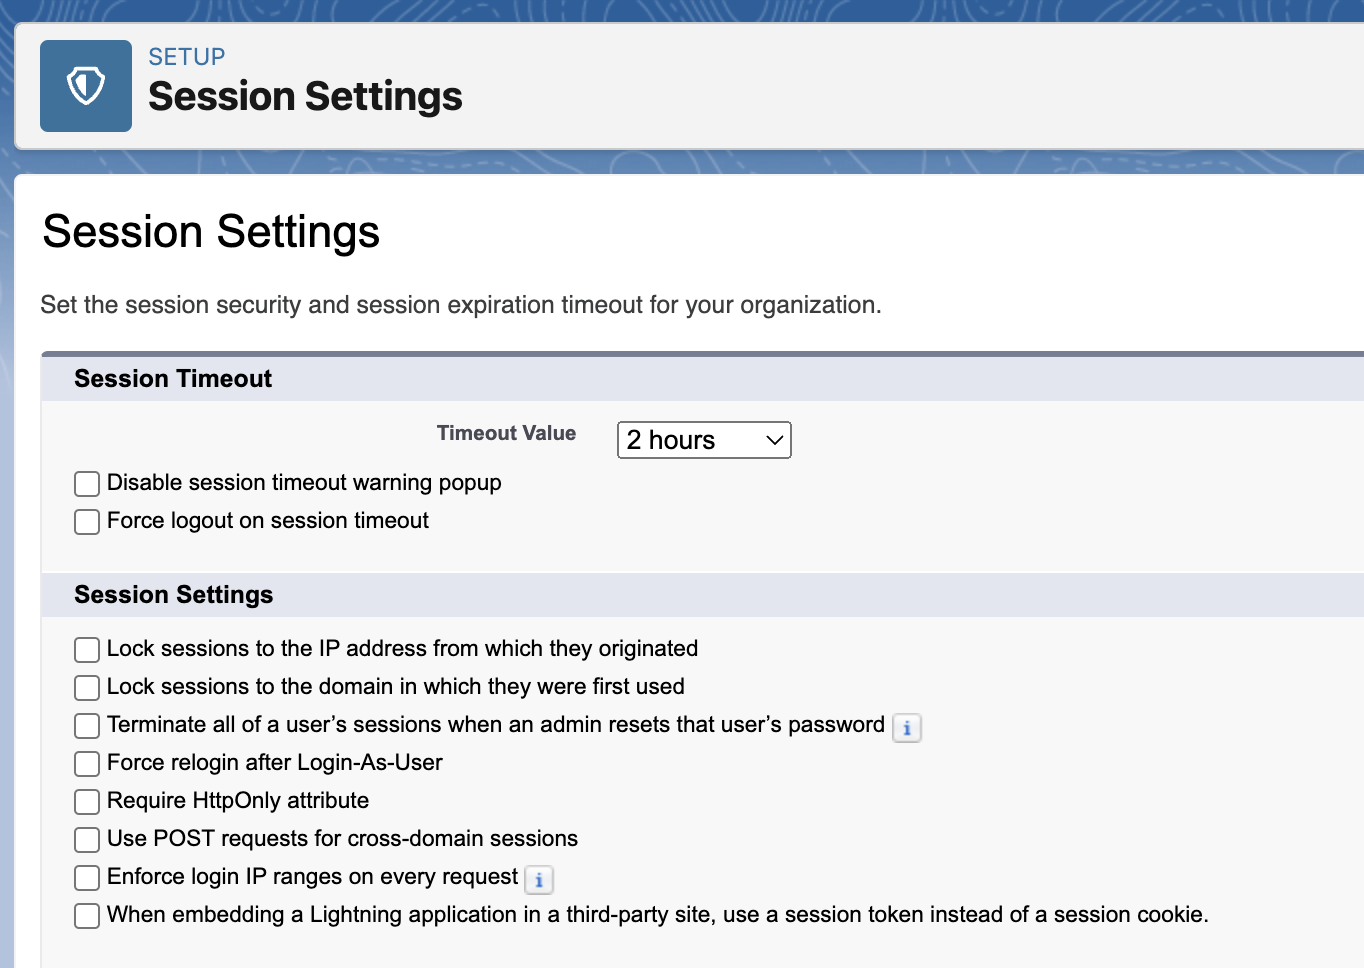
- From the quick find box enter "Session Settings" and then click on "Session Settings"
- Ensure the "Timeout Value" is 2 hours or longer
- Ensure "Lock sessions to the IP address from which they originated" is unchecked
- Ensure "Lock sessions to the domain in which they were first used" is unchecked
- Ensure "Enforce login IP ranges on every request" is unchecked
- Finally, be sure to click "Save" at the very bottom of the page
Enable Einstein Bots
In some cases, users get the error message "INSUFFICIENT_ACCESS: EntityObject can not be initialized with null EntityInfo" in this case, after trying the steps above, you may need to enable Einstein Bots as described here: https://issues.salesforce.com/issue/a02Ka00000eNetu/
Identity Verification Settings
Without proper identity verification settings, you might encounter an error that looks like...
INSUFFICIENT_ACCESS: Requires Extra Verification
To resolve this error see: https://docs.bluecanvas.io/docs/identity-verification-settings
Updated 6 months ago