Line-by-line editing in deployments
How to cherrypick specific lines of a file in a Salesforce deployment with Blue Canvas.
By default, when you select a file to deploy, it overwrites the target org with the entire contents of that file. This is a problem if other people have also made changes to the same file.
Blue Canvas allows you to “Edit” a file and cherrypick specific lines that you want to deploy within a file, while leaving the rest of the file unchanged. This prevents merge conflicts and code clobbering.

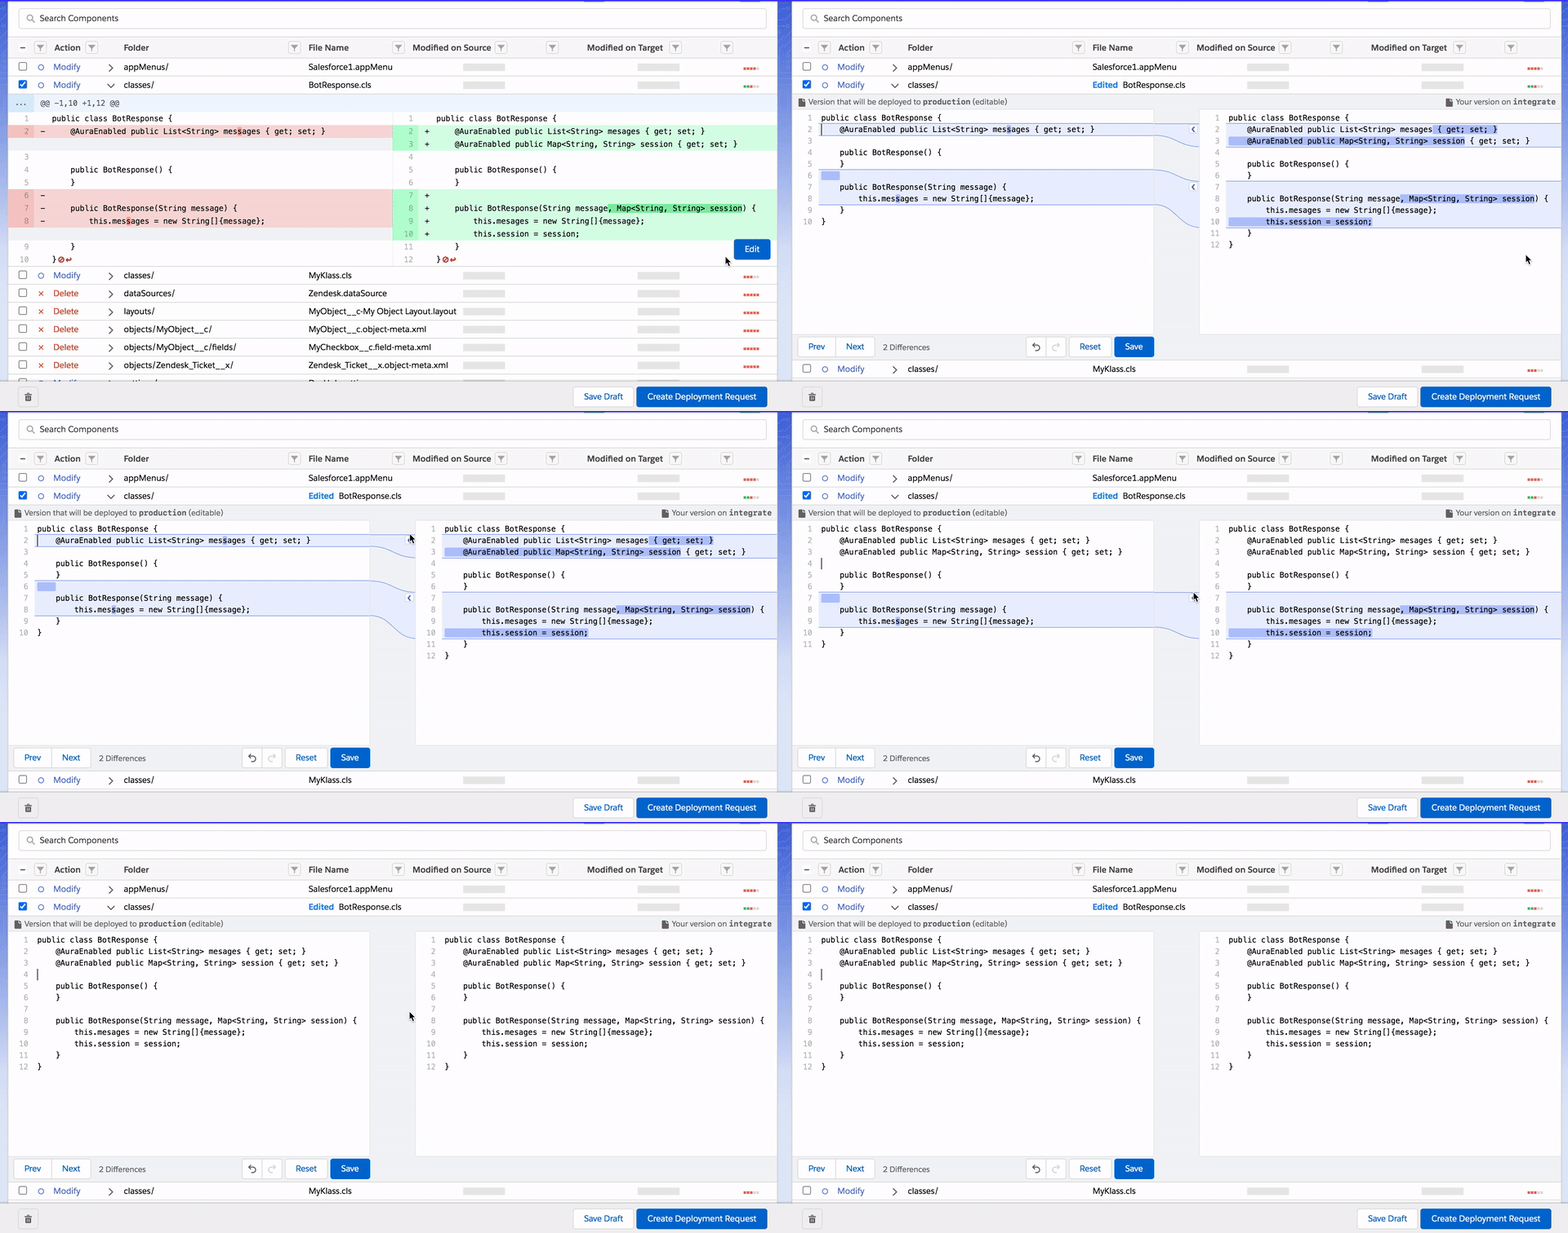
Blue Canvas' merge editor.
1. Expand a file in the Create Deployment Request page
First, compare any two environments. You will see see a > next to each file.
Click the > to expand and see the full diff. You’ll note the traditional Git colors: green for additions and red for deletions.
You can use the editor with any file type. It is intended for use with Modified files mostly.
2. Click Edit to open the merge editor
At the bottom right corner of the diff view there is a blue Edit button. You may have to scroll to see it.
Clicking that opens up an interactive text editor that you can use to edit a file before deployment.
Deployed edits show up in the target, not the source
When you deploy an edited file it will update the target org with the changes that are shown in the left panel. It will not update the source org with your changes.
3. Applying Sections of Lines
Blue Canvas will show you sections of changes based on the Git diff between the two versions of the file. In Git-terminology, this is also called a "hunk". You can navigate along hunks and copy them from one side to the other.
The contents of the file on the Target environment are displayed on the left side, while the source environment’s contents are displayed on the right (this is due to Git convention). The branch names are shown atop the files for clarity.
You can navigate a file by clicking Prev and Next to toggle through each of the Git hunks.
Next to each hunk is a ❮ that can be clicked to copy just those lines from the source org to the target org. For example, you can grab specific hunks to make changes to a single method in an Apex Class or one or two lines of XML rather than the entire file.
Saving, undoing, redoing, and reverting
You must Save a file before collapsing it again or before clicking Create Deployment Request.
You can undo and redo changes by clicking the undo and redo arrows.
If you click Revert it will clear your edits from the editor on the target branch. It will then show you the current diff between environments as if starting a comparison from scratch
4. Making changes directly in the editor
The panel on the left displays the current state of the file in the target branch and is “editable”. You can write lines of code directly in the editor in addition to grabbing hunks as describred above. This is particularly useful for quick fixes.
Note, that you will need to make sure syntax is correct or it will fail validation in the next step.
6. Cloning and saving drafts
If you clone a Deployment Request that contains edits to the file, those edits will show up in the cloned Deployment Request create page. Files are described as Edited with a blue indicator if they contain custom edits.
Click Revert if you want to start from a clean diff of the source and target branches without the cloned edits carrying over.
If you save changes to a file in the editor by clicking Save you can then also click Save Draft and when you reopen the Deployment Request draft it will remember your edits.
Updated almost 5 years ago
