
Bulk Releases
How to release multiple "stories" to other environments in a single deployment.
Blue Canvas allows you to create "stories" or Deployment Requests (DRs) which are units of change in your Salesforce org. These stories often correspond to units of work, sprints, tickets in JIRA or whichever system your team uses.
Often, you want to deploy multiple features from one environment to another all at the same time. Bulk Releases allow you to select multiple Deployment Requests and promote them to another upstream environment, for instance from a Staging sandbox, to a Production instance.
1. Create and Deploy Deployment Requests
To deploy stories you must have previous DRs created. These DRs will all be pointed to the same target environment - usually a staging, integration or UAT environment. You can learn more about creating DRs here.
Once you've deployed multiple DRs you can then promote them to other environments using a Bulk Release.
Tagging Deployment Requests
When creating DRs, Blue Canvas allows you to tag them so that you can easily filter for them later.
2. Create a Bulk Release
From the Deployments page, select "New Deliverable" -> "Bulk Release". Then select "Source" as the environment that has the changes you'd like to promote (this is usually something like a Staging, Integration, or UAT environment) and select "Target" to be the environment you'd like to promote to.

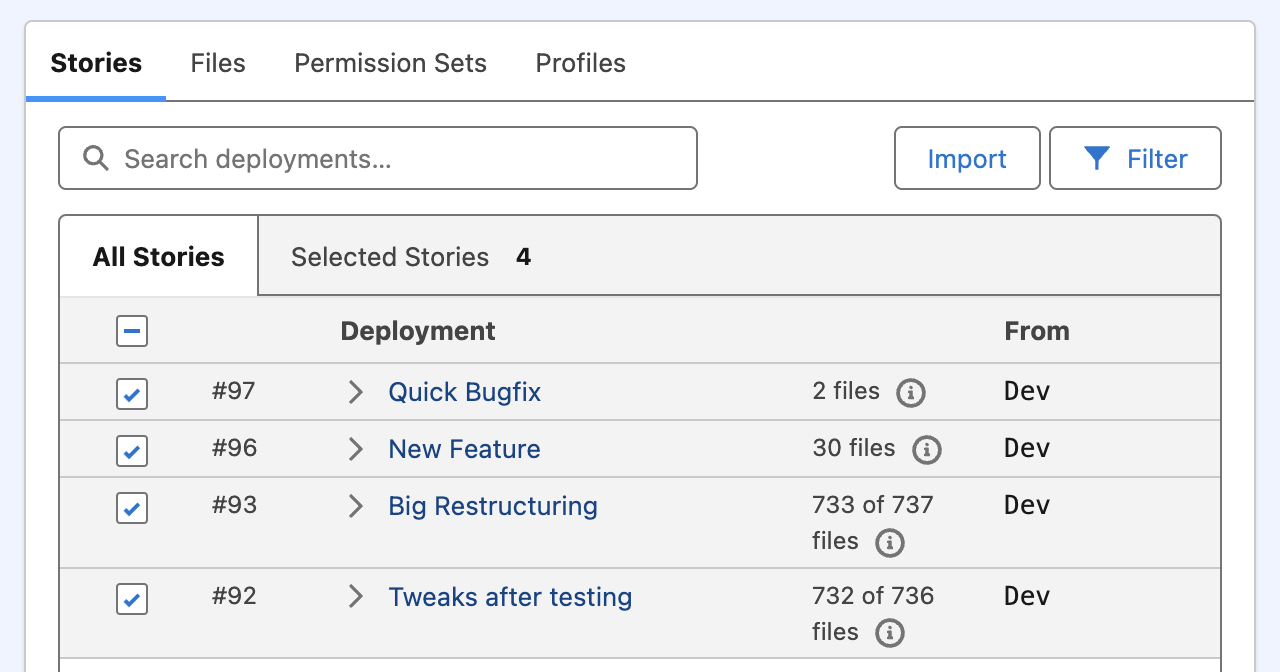
From there, you can add a title, description, labels, etc, just as with a normal deployment request. But then on the right hand side, you should see a list of Deployment Requests that were made to the Source environment that you can select.
You can also open up each Deployment to see which files will be added to the Bulk Release.

3. Add Individual Files, Profiles, and Permission Sets
Once you have all of your Deployment Requests selected. You can use the "Files" tab to add any other individual files that you might need. You can also use the Permission Sets and Profiles tab as necessary to check and deploy any related permissions that might be necessary.
Greyed Out Files?
You may notice that when you select a DR or story for a Release, some of the components show as greyed out. This is because though those files were included in the DR you are cloning from, those particular components are already deployed and equal on the new target org. We show them as greyed out so that you can see the record of the DR but they will not be included in the Release because they have already been accounted for.
4. Create Deployment Request to Create the Release
Once you've selected your DRs click Create Deployment Request to have it start validation. From here on out, the Bulk Deployment will behave just like a normal DR.
Importantly, you can check everything by referring to the tabs at the bottom of the page. This should show you which Stories were selected, along with which Files, Profiles, and Permission Sets are included in the deployment.
Once everything is validated, you can just hit Deploy and Blue Canvas takes care of the rest!
Updated over 1 year ago